If you’re itching to get your hands dirty and start planting but live in a rural area with a colder climate, you may be wondering how you can get a jump on the growing season. One way to do this is to plant seeds indoors and transplant them outdoors once the weather warms up.
It’s something I’ve done over the past few years and loved watching them grow indoors and out later in our rural area. However, last year with our home on the market for sale I didn’t get the chance to start indoors.
In the past, I made a few mistakes planting seeds and learned some things along the way with these garden seeds.
The most important thing is planning your summer garden, as almost everything about living in a rural area involves planning. Although it’s early, I noticed seeds were sold at our local hardware store yesterday.
Here’s everything you need to know to get started with your indoor garden.
Key Takeaways
- Start seeds indoors to get a head start in cold climates, then transplant outside once temperatures warm up.
- Use a seed-starting mix (not regular potting soil) and containers at least 3 inches deep with drainage holes.
- Keep most seeds at 65 to 75°F (18 to 24°C) for better germination, a seedling heat mat can help.
- Plant most seeds at about twice the seed’s diameter, then keep soil evenly moist (not soggy) to avoid disease.
- Prevent transplant shock by hardening off seedlings for one week, slowly adding outdoor light and cooler temps.
What you need” checklist
- Seed-starting mix
- Trays (3 inches deep)
- Labels
- Light source
- Heat mat
- Humidity dome or plastic cover
- Spray bottle
- Journal
Before Planting – Supplies You’ll Need
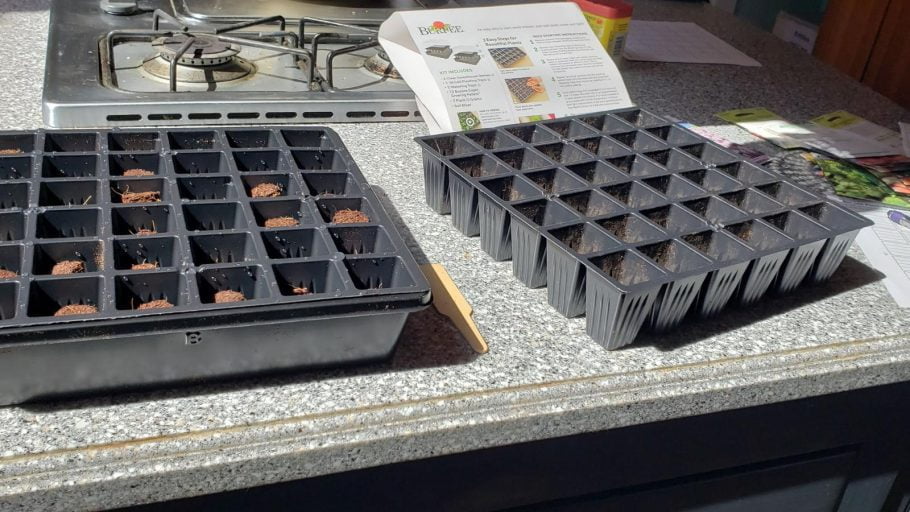
Starting your plants from seeds is a relatively simple process, but you’ll need a few supplies to get started. First, you’ll need a seed-starting mix, which is different from the regular potting soil.
The seed-starting mix is lightweight and sterile, which helps prevent disease. You’ll also need a container to plant your seeds in. Choose containers that are at least 3 inches deep and have drainage holes in the bottom.
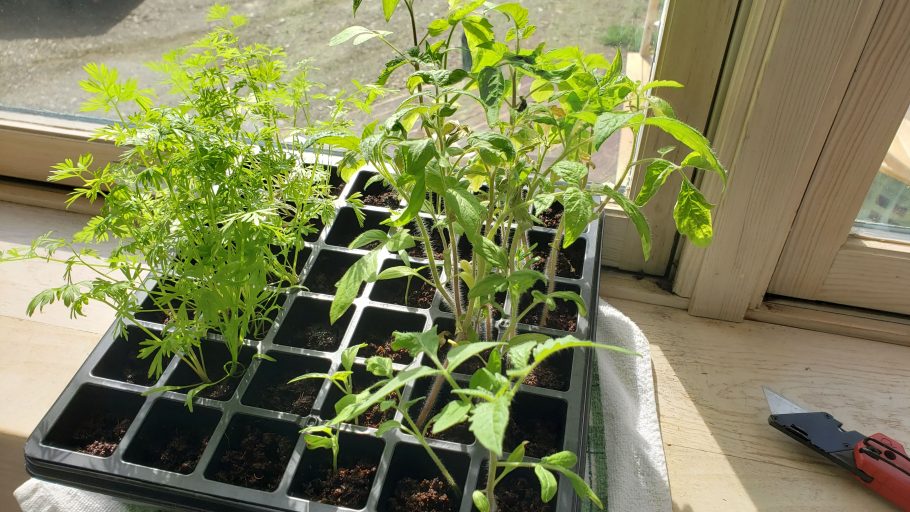
Of course, you can purchase a starter kit, as shown in the photo above.
1. Heat Sources For Planting Seeds
Finally, you’ll need a source of heat and light. A south-facing window may provide enough light, but you may need to supplement with grow lights if your windows don’t get direct sunlight for at least six hours per day.
As for heat, a seedling heating pad will do the trick. Just be wary if you have cluster flies at the same time as your plantings. They are attracted to the bright light.
2. Temperature Control
Maintaining the right temperature is crucial for seed germination and healthy seedling growth. Most seeds germinate best at temperatures between 65 and 75°F (18 and 24°C).
Consider using a heating mat designed for seed starting to keep the soil consistently warm, promoting quicker and more uniform germination.
Additionally, adjusting the room temperature by placing seed trays in a warm area of your home can also help create an optimal environment for your seeds to sprout.
3. Humidity Management of Planting Seeds Indoors
Proper humidity levels play a significant role in the success of your indoor seed-starting venture. Seedlings require adequate moisture in the air to prevent drying out. To maintain optimal humidity, consider misting your seedlings regularly with a spray bottle.
Alternatively, using a humidity dome over your seed trays can help retain moisture and create a humid microclimate that supports seed germination and growth. If needed, a small humidifier in the room can help regulate humidity levels for your growing seedlings.
By ensuring the right balance of temperature and humidity in your indoor growing space, you are setting the stage for healthy seedlings to sprout and thrive.
Get ready to witness the magic of new life unfolding right before your eyes as you provide the perfect environment for your seeds to grow into strong, vibrant plants.
4. When To Plant Your Seeds
The first step is to figure out when to plant your seeds. This will vary depending on the type of plant you’re growing.
Some plants, like tomatoes, need to be started indoors six to eight weeks before the last frost date. Of course, if you are in mud season, it may not matter what the temperatures are.
Others, like cucumbers, can be started as late as three weeks before the last frost date. You can find the last frost date for your area by visiting The Old Farmer’s Almanac website and entering your zip code.
5. Selecting the Right Seeds For Indoor Planting
Planting seeds indoors in cold weather can be a rewarding and productive activity. When selecting the right seeds for indoor cultivation, it’s essential to consider various factors to ensure a successful growing experience.
6. Researching Planting Seed Varieties
Researching different seed plant varieties that thrive indoors is a crucial first step. For beginners, herbs like basil, cilantro, or chives are a great place to start, thanks to their adaptability to indoor conditions and simple care requirements.
Vegetables such as lettuce, cherry tomatoes, and peppers also tend to do well indoors. Additionally, flowers like marigolds, petunias, and geraniums can add beauty to your indoor garden.
7. Checking Seed Packets
When choosing to plant seeds, checking the information provided on seed packets is vital. These packets contain valuable instructions on planting depth, light requirements, and any special considerations specific to the plant.
Following these guidelines is paramount for successful seed germination and healthy plant growth. Be sure to pay attention to details such as spacing requirements and suggested watering schedules to give your seeds the best possible start.
Indoor gardening offers a unique opportunity to nurture plants in a controlled environment, allowing you to enjoy fresh produce or vibrant blooms regardless of the outdoor weather conditions.
By selecting the right planting seeds based on their compatibility with indoor growing conditions and your available space, you set yourself up for a flourishing indoor garden with a bountiful harvest.
Planting Seeds Indoors
Once you have all of your supplies, it’s time to plant your seeds. Fill your containers with seed-starting mix and moisten them with water until they are evenly damp but not soggy.
Soggy soil can lead to fungal diseases, so be sure not to overwater. Next, use a pencil or another sharp object to make 1/2-inch-deep holes in the soil. Drop 2 or 3 seeds into each hole, then lightly cover them with more seed-starting mix.
Gently press down on the soil to compact it around the seeds. Water the soil again until it is evenly damp. I covered them with a clear plastic sheet to keep them warm.

8. Seed Planting Depth
When planting seeds, a general rule of thumb is to plant them at a depth of about twice the seed’s diameter. Smaller seeds, like lettuce or basil, should be sown shallowly, barely covered with soil, while larger seeds, like beans or squash, should be planted deeper.
Following the correct planting depth ensures that seeds have the right conditions to sprout and thrive.
9. Watering Techniques
Proper watering is crucial for seedlings’ growth. Overwatering can lead to damping off and root rot, while underwatering can cause stunted growth.
To water seedlings effectively, use a spray bottle to deliver a fine mist that won’t disturb the seeds. Alternatively, bottom watering by placing the seedling tray in a shallow container of water allows roots to absorb moisture gradually.
Lighting For Your Seeds
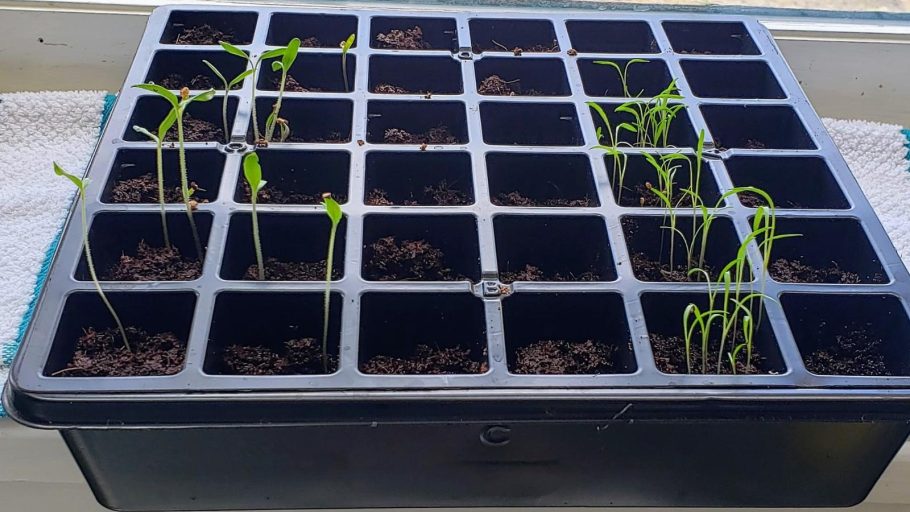
Place your containers in an area that receives plenty of light and keep the soil moist but not soggy. Once your seedlings emerge, thin them to leave only the strongest plant in each container.
When transplanting seedlings outdoors, be sure to harden them off first. You do this by gradually acclimating them to cooler temperatures and direct sunlight over the course of one week.
This will help prevent shock and ensure that your plants thrive in their new outdoor home. That’s something I did not know last year, and I lost a few plants because I transplanted them in one day.
Luckily, I still had lots of fresh vegetables for months to come for my recipes.
10. Easiest Crop From Planting Seeds Indoors
My easiest crops to plant and harvest last year were:
- Spinach
- Tomatoes
- Corn
- Watermelon
- Zucchini
- Eggplant
It was amazing to see how the corn seeds for planting take off quickly indoors, and then once you transplant them outdoors.
Monitoring Seedling Progress
Regularly monitoring your seedlings’ progress is a crucial aspect of successful indoor seed starting. By keeping a gardening journal, you can track important details such as seed-starting dates, growth milestones, and observations along the way.
This practice not only helps you stay organized but also provides valuable insights into what works best for your plants. Each planting experience offers a chance to learn and improve your skills as a gardener.
11. Record Keeping For Planting Seeds Indoors
Maintaining a gardening journal lets you look back and review your seed-starting journey. Note down the dates you planted each type of seed, record the germination rates, and document any issues or successes you encounter.
Tracking this information over time can help you identify patterns and make informed decisions for future plantings. Additionally, jotting down your observations can serve as a reference point for troubleshooting problems that may arise.
12. Troubleshooting Seedling Problems
Seedlings can face various challenges during their early growth stages. Common issues such as:
- Damping off
- Leggy growth
- Inadequate light
- Overwatering
Overwatering can impede the growth of your seedlings. If you notice any signs of distress in your seedlings, it’s essential to act promptly to address the root cause.
For damping off, ensure proper air circulation and avoid overwatering. Leggy seedlings may benefit from additional light sources or adjusting their growing conditions.
By diagnosing problems early and applying suitable solutions, you can help your seedlings thrive and reach their full potential.
Conclusion of Planting Seeds Indoors Early
With a little planning and some basic supplies, you can get a jump on spring planting this year. By starting your seeds indoors, you’ll be able to transplant them outdoors sooner when the weather warms up.
However, if you are late like I was this year, you can start them outdoors the same way. Mine are out today as of June 2nd. Stay tuned to see how it turns out this year.
Just be sure to do your research ahead of time so you know when to plant your seeds and what type of care they’ll need. Have you ever planted seeds indoors first?
Frequently Asked Questions About Planting Seeds Indoors in Cold Areas
When should I start seeds indoors if I live in a cold climate?
Use your area’s last frost date, then count backward based on the plant. For example, tomatoes often need a 6 to 8-week head start, while cucumbers can be started about 3 weeks before the last frost. You can find your local last frost date by entering your zip code at The Old Farmer’s Almanac.
What temperature is best for germinating seeds indoors?
Most seeds germinate best between 65 and 75°F (18 and 24°C). If your home runs cool, place trays in a warmer spot or use a seed-starting heating mat to keep soil temps steady.
What soil should I use for starting seeds indoors?
Use a seed-starting mix, not regular potting soil. Seed-starting mix stays lighter and is usually sterile, which helps lower the risk of seedling disease.
How deep do I plant seeds indoors?
A simple rule is to plant seeds about twice as deep as the seed’s diameter. Tiny seeds (like lettuce or basil) need only a light cover of soil, while larger seeds need a deeper hole.
How do I avoid killing seedlings when I move them outside?
Harden them off for about one week. Start with short outdoor sessions, then slowly increase time outside, sun exposure, and cooler temps each day. This helps prevent transplant shock.

Lisa moved from Southern New England to the rural mountains of Maine in 2020 with her husband. Drawing from her hands-on experience with slower-paced rural living, she shares the beauty, honest realities, and simple pleasures of life in the Maine woods, along with their rural travels across the United States and abroad.